
Introdução
Substituir uma Junta Homocinética Deslizante requer alguns cuidados e ferramentas especificas.
-
-
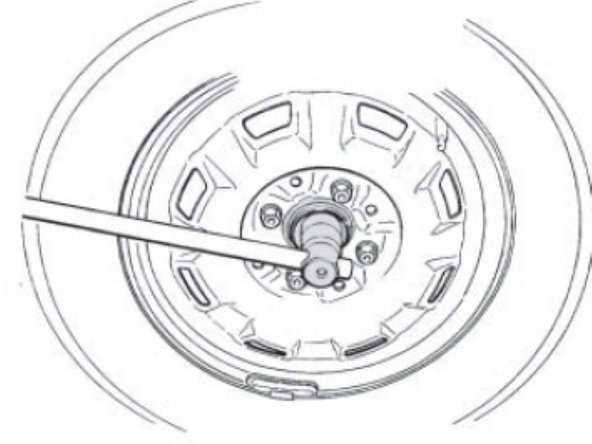
Com o veículo apoiado no chão, solte a porca do semi-eixo e os parafusos da roda; Com o veículo suspenso, remova a roda;
-
Solte as porcas do pivô e do terminal de direção; Utilizando um Extrator , remova o pivô e o terminal;
-
Retire os parafusos que ligam a torre de suspensão a manga de eixo;
-
Com o auxilio de uma alavanca, force a bandeja para baixo para desacoplar o pivô;
-
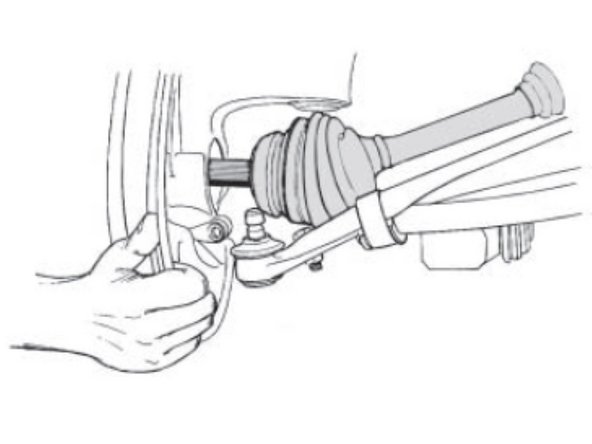
Puxe a manga de eixo para liberar a Junta Fixa, caso necessite, use um martelo de poliuretano;
-
Solte os 6 parafusos de fixação da Junta Deslizante da tulipa e remova o semi-eixo do veículo.
-
-
-
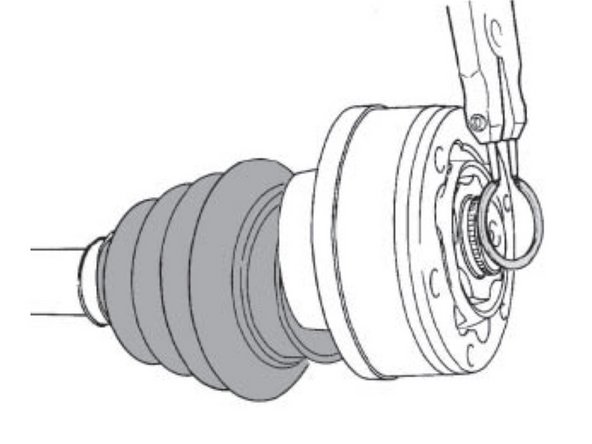
Utilizando um Alicate para anéis, abra o anel trava e remova do eixo;
-
Remova a Junta Deslizante , o calço e a coifa;
-
Limpe o Semi-eixo para evitar a contaminação da graxa.
-
-
-
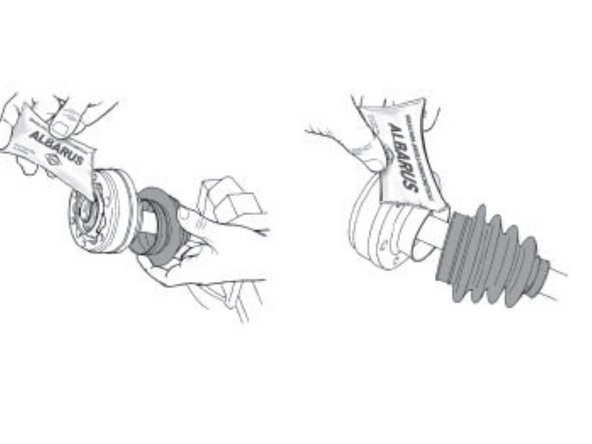
Monte manualmente a Coifa e o calço;
-
Encaixe a Junta Deslizante no semi-eixo. Atenção quanto ao posicionamento, o rebaixo deve estar voltado para o lado do câmbio;
-
Monte o anel trava;
-
Aplique a graxa na Junta Deslizante;
-
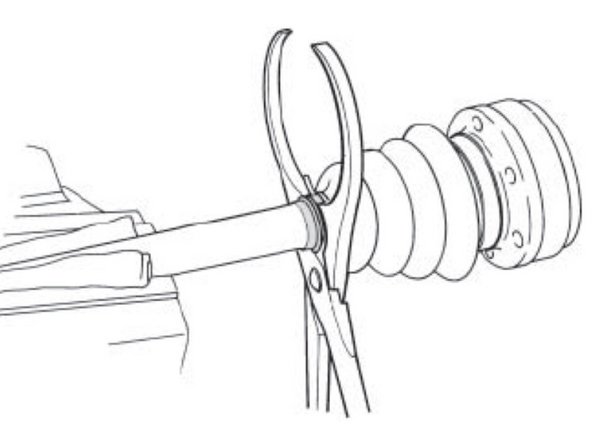
Fixe a abraçadeira maior com o auxilio do Alicate especial; Antes de fixar a braçadeira menor, utilize uma chave de ponta roliça entre a coifa e o eixo pra entrar um pouco de ar. Fixe a braçadeira menor, posicionando no rebaixo do eixo.
-
-
-
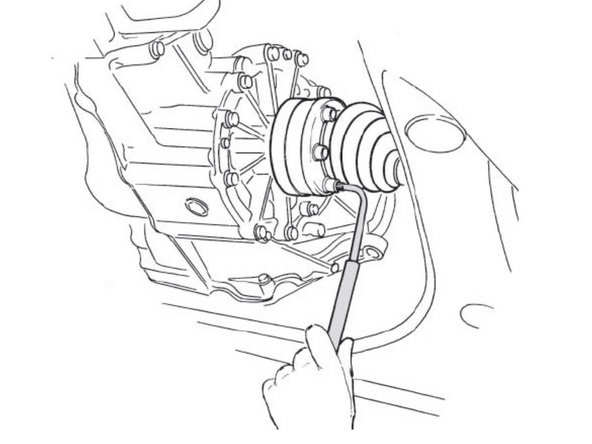
Encaixe a Junta Deslizante na tulipa do câmbio; encaixe o flange da coifa e a chapas de fixação. Coloque o parafusos;
-
Aplique 40 Nm de torque nos 6 parafusos de fixação da Junta Deslizante;
-
Coloque a ponta da Junta Fixa no Cubo. Encaixe a Manga de eixo no Pivô e posteriormente os parafusos da torre de suspensão. Instale o terminal de direção;
-
Aperte as porcas dos Pivô e do Terminal de direção.
-
Coloque a nova porca da Semi-eixo, não reutilize a porca antiga. Posicione a Roda e os parafusos da roda.
-
Com o veículo apoiado no chão, aperte as porcas da roda. Aplique 216 Nm na porca do Semi-eixo.
-
Para evitar desaperto acidental, recrave o colarinho da porca do eixo no rebaixo da Junta.
-
-
-
Sob quaisquer circunstâncias deve-se tentar qualquer conserto ou manutenção para o qual não foi treinado ou se não possui as ferramentas e equipamentos para o conserto.
-
Sempre use os óculos de segurança adequado quando fizer algum tipo de manutenção. Não usar os óculos de segurança pode resultar em ferimento e/ou perda parcial ou completa da visão.
-
Seja sempre cuidadoso ao trabalhar com produtos que tenham pontas afiadas.
-
-
-
Parte importante do trabalho e da própria operação da sua oficina é o descarte correto dos produtos que serão substituídos. Faça a sua parte e juntos contribuímos para um futuro sustentável.
-
Saiba mais em http://www.spicer.com.br/danatureza
-


Evite danos e desgastes prematuros, após a instalação do Semi-eixo, verifique a geometria do veículo.
Evite danos e desgastes prematuros, após a instalação do Semi-eixo, verifique a geometria do veículo.
