Introdução
Substituir um Mancal Central Spicer é um procedimento simples, e envolve, 6 etapas: remoção do Cardan, desmontagem da Ponteira, desmontagem do Mancal Central, instalação do Rolamento e do Mancal Central, montagem da Ponteira e instalação do Cardan no veículo.
Ferramentas
Peças
-
-
Nunca remova o Cardan sem antes certificar de que o veículo está freado ou calçado;
-
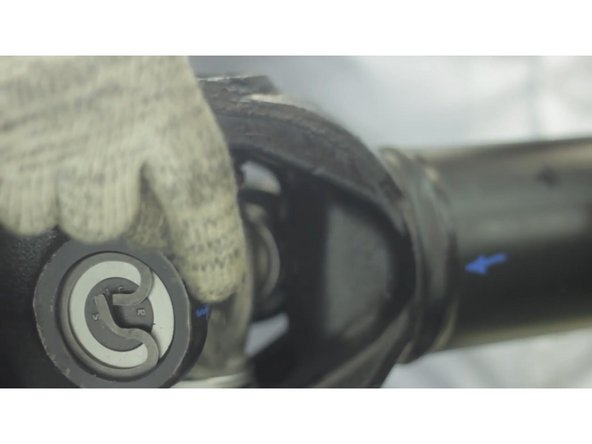
Antes de retirar o Cardan, faça marcações dos componentes para garantir o alinhamento, use uma régua se necessário;
-
Remova as braçadeiras da Cruzeta;
-
Solte a Luva de Cardan da Ponteira Deslizante;
-
Solte os parafusos que fixam o Cavalete do Mancal ao chassi;
-
Retire o Cardan do veículo.
-
-
-
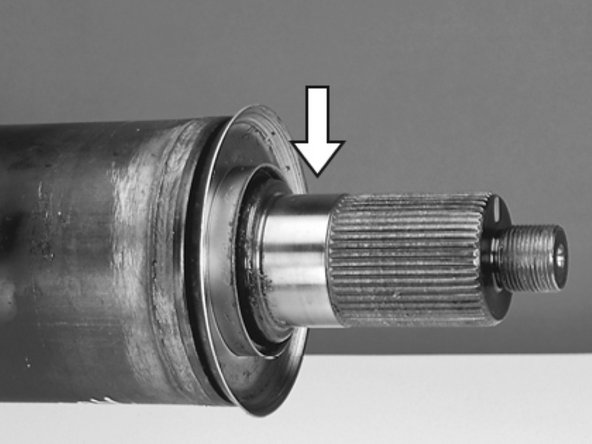
Remova o coxim de borracha do Mancal, caso necessário utilize alavanca ou espátula;
-
Caso haja dificuldade em sacar o rolamento, não utilize serras ou talhadeira para cortá-lo, impactos podem danificar a ponteira ou até mesmo desbalancear o Cardan. A utilização de maçaricos ou calor para dilatar o rolamento, também não são indicados, a variação de calor pode gerar empenamento. Utilize um extrator de rolamentos (saca polia).
-
-
-
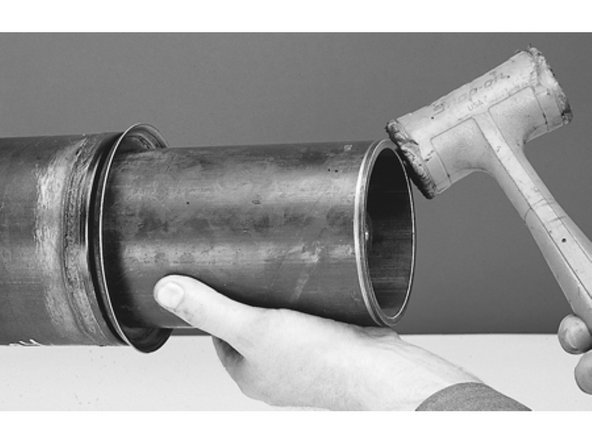
Limpe bem os componentes e alojamentos antes de montar;
-
Encaixe o conjunto do Mancal Central manualmente, caso necessite, utilize um martelo de poliuretano para ajustar o posicionamento do rolamento. Monte o mancal central sobre a Ponteira do Cardan utilizando extensão tubular apoiando o rolamento pelo anel interno metálico tomando o devido cuidado para não danificar a vedação do rolamento.
-
-
-
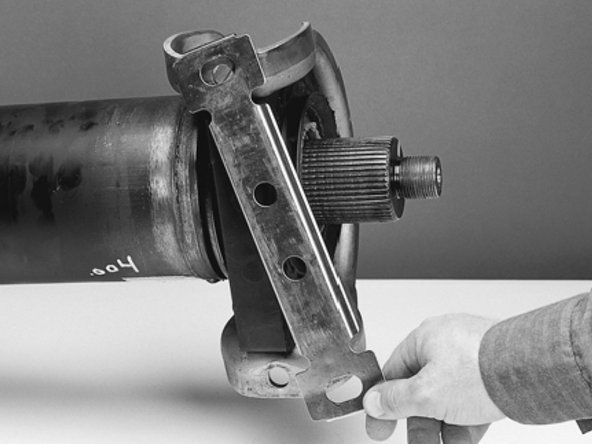
Observe atentamente as marcações feitas no Cardan para o correto alinhamento;
-
Encaixe a Ponteira Deslizante na Luva de Cardan;
-
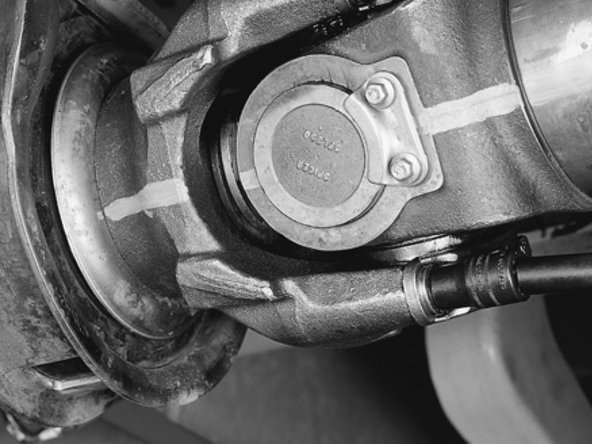
Instale o Mancal no Chassis e aperte os parafusos do Cavalete. Certifique que o mancal central não ficou deformado após sua fixação. Desalinhamentos podem causar danos ao coxim de borracha do mancal;
-
Monte a Cruzeta. Posicione as braçadeiras. Aplique de 162,7 a 183 Nm de torque nos parafusos das braçadeiras.
-
-
-
VERIFIQUE AS MARCAÇÕES PARA GARANTIR O ALINHAMENTO.
-
-
-
Sob quaisquer circunstâncias deve-se tentar qualquer conserto ou manutenção para o qual não foi treinado ou se não possui as ferramentas e equipamentos para o conserto.
-
Sempre use os óculos de segurança adequado quando fizer algum tipo de manutenção. Não usar os óculos de segurança pode resultar em ferimento e/ou perda parcial ou completa da visão.
-
Seja sempre cuidadoso ao trabalhar com produtos que tenham pontas afiadas.
-
A lubrificação inadequada ou o reaproveitamento das peças de acoplamento ou parafusos podem causar a falha do cardan ou até a separação do cardan do veículo. Um cardan separado do veículo pode causar acidente e até mesmo mortes. Não arrisque com a segurança.
-
-
-
Parte importante do trabalho e da própria operação da sua oficina é o descarte correto dos produtos que serão substituídos. Faça a sua parte e juntos contribuímos para um futuro sustentável.
-
Saiba mais em http://www.spicer.com.br/danatureza
-